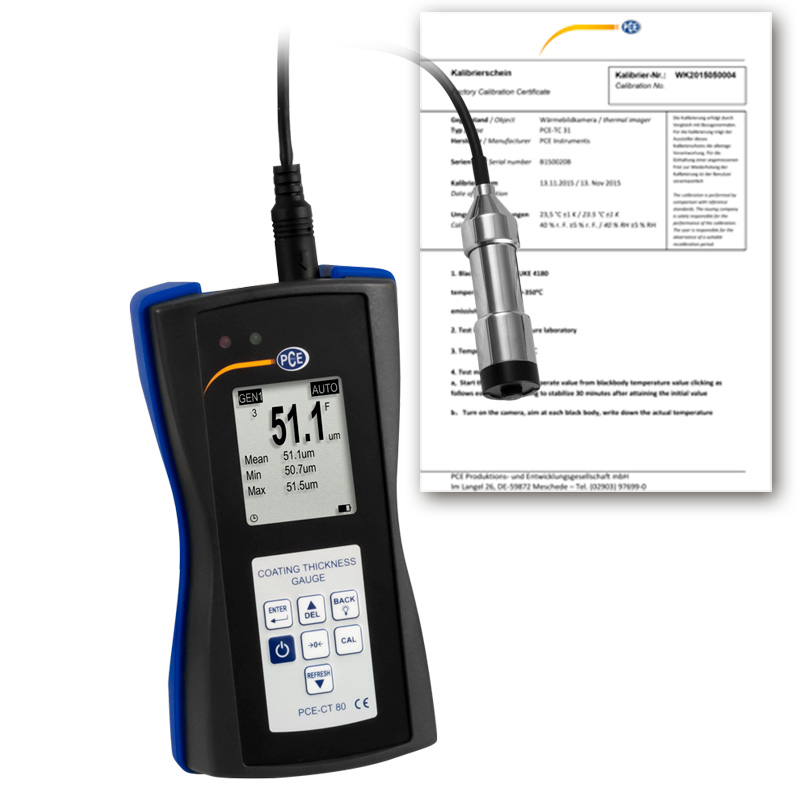
Thickness Meter PCE-CT 80-ICA Incl. ISO Calibration Certificate
PCE-CT 80-ICA
Availability : กรุณาติดต่อสอบถาม
หมวดหมู่: Thickness Meter
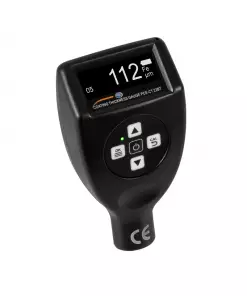
Thickness meter PCE-CT 80-ICA incl. ISO calibration certificate
Coating thickness gauge for Fe and NFe / USB interface / Battery operation / Integrated data memory / Various sensors available
Coating thickness gauge for Fe and NFe / USB interface / Battery operation / Integrated data memory / Various sensors available
The paint layer thickness gauge PCE-CT 80 is a measuring device for the nondestructive measurement of coatings (paints, lacquers, plastics …) on steel / iron and non-ferrous metals. Thanks to the externally connected sensor on the PCE-CT 80 ink layer thickness gauge, even difficult-to-reach measuring points can be easily achieved. The menu navigation of the paint thickness gauge allows easy adjustment and setting to new parameters and makes this handy paint coating thickness gauge an indispensable tool for control measurements in production, workshop and quality assurance. Includes FN1.5 probe in kit for 0 … 1500 μm or 0 … 59 mils measurements.
The color coating thickness gauge PCE-CT 80 is also ideally suited for detecting and assessing eg accident damage to motor vehicles immediately, but also in the industrial sector the paint thickness gauge can be optimally used in incoming and outgoing inspections as well as material testing in production.
The ergonomically shaped PCE-CT 80 ink layer thickness gauge with external sensor allows you to quickly determine measurement results with high accuracy. The paint thickness gauge measures non-magnetic layers such as paint, plastic, chrome, copper, zinc, enamel, etc. on steel / iron, and non-electrically conductive layers such as paint, plastic, enamel, paper, glass, rubber, etc. on copper, aluminum, brass and stainless steel, as well as anodized aluminum.
– For many materials such as, iron, steel, aluminum, copper, brass and stainless steel
– Measurements can not be influenced by vibrations
– Practical V-groove on the measuring heads
– Ergonomic design
– Warning for measurements outside the maximum measuring range
– Wear-resistant, spring-mounted measuring head for precise measurement results
– Incl. ISO laboratory calibration with certificate
– Various optional sensors available
| Measuring range | Fe: 0 to 5000 μm / 0 … 196.9 mils |
| NFe: 0 to 3000 μm / 0 … 118.1 mils | |
| Accuracy | ± (2% ofreading + 1 μm / 0.039 mils) |
| Resolution | 0.1 μm (0.0039 mils) (< 100 μm / 3.94 mils) |
| 1 μm / 0.039 mils (> 100 μm / 3.94 mils) | |
| Measurable materials | Non-magnetic layers on steel, iron, … |
| Non-electrically conductive layers on aluminum, copper, … | |
| Min. radius of curvature convex | 5 mm / 0.2 in |
| Min. radius of curvature concave | 25 mm / 1 in |
| Min. measuring surface | Ø17 mm / 0.7 in |
| Min. substrate thickness | 0.2 mm / 0.08 in (on magnetic materials) |
| 0.05 mm / 0.002 in (on non-magnetic materials) | |
| Probe mode | Autom. Mode with material detection (Fe + NFe) |
| Magnetic mode (Fe) | |
| Eddy current mode (NFe) | |
| Measurement mode | Single measurement |
| continuous measurement | |
| Calibration | Multipoint calibration (1 … 4 points for each group) |
| Zeroing | |
| Units | μm, mm, mils |
| Data transfer | USB 2.0 |
| Storage | A volatile measuring group (DIR mode) |
| Four measuring groups with autom. Storage and max. 2000 readings (GEN mode) | |
| Statistical functions | Number of Measured values, mean, minimum, maximum, standard deviation |
| Alarm | Display when the adjustable upper and lower alarm limits are exceeded |
| Operating time | Autom. Shutdown mode (3 min.) |
| Power supply | 3 x 1.5V AAA batteries |
| Display | 128 x 128 px LCD display |
| Indicators | Battery status |
| Fault detection | |
| Operating conditions | 0 … 50°C / 32 … 122°F |
| 20 … 90% RH not condensing | |
| Storage conditions | -10 … 60°C / 14 … 140°F |
| 20 … 90% RH not condensing | |
| Dimensions | (L x W x H) 143 x 71 x 37 mm / 5.6 x 2.8 x 1.5 in |
| Weight | With sensor and batteries: approx. 271 g / < 1 lb |
เฉพาะลูกค้าที่เข้าสู่ระบบ และเคยซื้อสินค้าชิ้นนี้แล้วเท่านั้น ที่เขียนบทวิจารณ์ได้
สินค้าที่เกี่ยวข้อง
Thickness Meter
PCE-TG 120
Thickness Meter
Thickness Meter PCE-TG 300-ICA incl. ISO calibration certificate
PCE-TG 300-ICA
PCE-CT 100N-ICA
PCE-TG 50-ICA
Thickness Meter
PCE-CT 25FN
Thickness Meter
PCE-CT 22BT
Thickness Meter
PCE-CT 23BT
Thickness Meter
ราคาพิเศษ ฿26,387.10 excl VAT
฿28,234.20 incl VAT
฿28,234.20 incl VAT
PCE-TG 50





รีวิว
ยังไม่มีบทวิจารณ์