Paint Gloss Tester PCE-GM 75
PCE-GM 75
Availability : กรุณาติดต่อสอบถาม
Gloss meter
Surface testing for curvy and small surfaces / Data memory for 1,245 readings / Measuring geometry 60° / Evaluation also possible without additional software / One-key operation / Calibration standard included
The gloss meter has a measuring surface of Ø 4.5 mm. Thanks to this small measuring surface, the gloss meter enables measurements on particularly small surfaces. With a maximum inaccuracy of 1%, the gloss meter is a high-precision measuring instrument for fast and easy measurements on surfaces. The one-button operation allows quick and easy operation of the surface inspection device.
Another special feature of the gloss meter is the data storage function. This gloss meter automatically stores up to 1,245 measurements. To read the data, the gloss meter must be connected to a computer. No additional drivers or software are required to read the data from the gloss meter. The stored data is saved in the .txt file format on the surface inspection device and can be analyzed directly. In addition to the storage of the measured data, a time stamp is created per measurement.
Gloss measurement on curvy and small surfaces
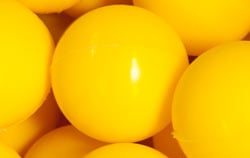 Gloss is one of the criteria that is always taken into consideration when it goes about quality assessment. Correct analysis of the gloss of a certain surface helps to make conclusions about the quality and whether the necessary standards have been met during the production or repair process. Excessive or insufficient gloss may be an indication of the application of the wrong methods and time of the surface treatment, wear-out, deteriorating condition, and loss of the protective function, since gloss has not only optical effect, but very often, it also performs protective function if coating is applied.
Measurement on the even flat surfaces is an easy-to-perform task, but it often happens that the surface is curvy or the area to be measured is very small. For such challenging tasks a small portable gloss meter has been designed and due to this device even the measurement on the most complicated surfaces has become feasible. Operation of the gloss meter is easy, but the user should remember to be careful to obtain the most accurate results. The sample to be measured or some part of it must be in a stable position as well as the meter and for each separate part of the curvy surface the upper and lower gloss limits should be determined separately. The convenience and possibility to get the best measuring position is also provided by the design of the measuring instrument. A small measuring window as well as the support area is so small that the device can be applied even on the tiniest parts of the surface. 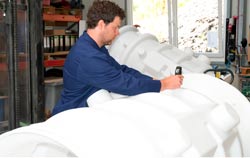 The examples of curvy surfaces may be numerous: parts of the automobiles, bottles, ceramics, window frames, doors, such materials as marble or granite etc. The gloss meter applied on such surfaces carries out the measurement continuously and thus, even the most complicated geometry of the surface, where the character of the surface changes does not prevent the device from getting very accurate data. Application of the other measuring instruments for this purpose does not compare in accuracy with the results provided by the gloss meter.
Gloss and ISO requirements
Gloss – is one of those parameters that has got its own paragraph in ISO requirements, which means that as all the other parameters, it should be treated with attention and responsibility. Curvy surfaces often have more functionality and a much better optical look, and should not be ignored and left in the background by the producers just because the measurements on them are much more challenging. Application of the correct device destroys this type of obstacle and turns the challenging tasks into doable.
– Data memory for later evaluations
– For measurements on small surfaces
– Measuring range up to 1000 GU
– Precise measurements thanks to high accuracy
– Micro USB interface for PC connection
– Simple one-button operation
| Measuring range | 0 … 99.9 GU |
| 100 … 1000 GU | |
| Resolution | 0.1 GU |
| 1 GU | |
| Repeatability | < 0.45 GU |
| 0.5% | |
| Accuracy | < 1 GU |
| 1% | |
| Measurement geometry | 60° |
| Measuring surface | Ø4.5 mm |
| Data storage | 1,245 measured values |
| Interface | Micro USB |
| Power supply | 2 x 1.5V AAA batteries |
| Environmental conditions � | 0 … 40°C / 32 … 313°F, < 85% rh non-condensing |
| Dimensions | 115 x 65 x 25 mm / 4.5 x 2.6 x 1 in |
| Weight | 100 g / < 1 lb |
| Standardize | GB9754-88, GB9966.5, ISO2813, JJG696-2002 |
เฉพาะลูกค้าที่เข้าสู่ระบบ และเคยซื้อสินค้าชิ้นนี้แล้วเท่านั้น ที่เขียนบทวิจารณ์ได้
สินค้าที่เกี่ยวข้อง
Paint Test Equipment / Paint Testing Equipment
Paint Thickness Tester PCE-CT 22BT-ICA incl. ISO Calibration Certificate
PCE-CT 22BT-ICA
Paint Test Equipment / Paint Testing Equipment
PCE-CRC 10
Paint Test Equipment / Paint Testing Equipment
PCE-CT 28
Paint Test Equipment / Paint Testing Equipment
PCE-CT 25FN
Paint Test Equipment / Paint Testing Equipment
Paint Roughness Tester PCE-RT 2000-ICA Incl. ISO Calibration Certificate
PCE-RT 2000-ICA
Paint Test Equipment / Paint Testing Equipment
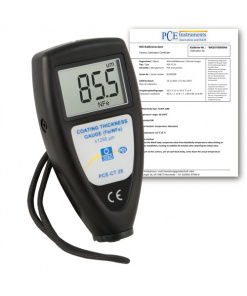
Paint Thickness Tester PCE-CT 28-ICA incl. ISO Calibration Certificate
PCE-CT 28-ICA
Paint Test Equipment / Paint Testing Equipment
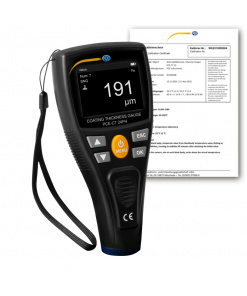
Paint Thickness Tester PCE-CT 24FN-ICA incl. ISO Calibration Certificate
PCE-CT 24FN-ICA
Paint Test Equipment / Paint Testing Equipment
Paint Thickness Tester PCE-CT 65-ICA incl. ISO Calibration Certificate
PCE-CT 65-ICA






รีวิว
ยังไม่มีบทวิจารณ์